Oven-Baked Beef Back Ribs
We had a couple of slabs of beef back ribs in the freezer and were looking for something to do with them. I saw this recipe online and thought it was worth a try, with a few modifications of my own. The idea is simple: cut the ribs between the bones, dry rub and let them sit a while, bake them, then finish them off under the broiler.
Oven-Baked Beef Back Ribs
Ingredients
- Dry Rub
- 1 tbsp onion powder
- 1 tbsp garlic powder
- 2 tbsps brown sugar
- 1 tbsp oil
- 1/2 tsp cumin
- 1/2 tsp salt
- 1 tsp chili powder
- 1 tsp smoked paprika
- Other
- 2.5 lbs beef back ribs, cut between the bones
- 2 tbsp BBQ sauce
Directions
Combine dry rub ingredients in a bowl and mix well.
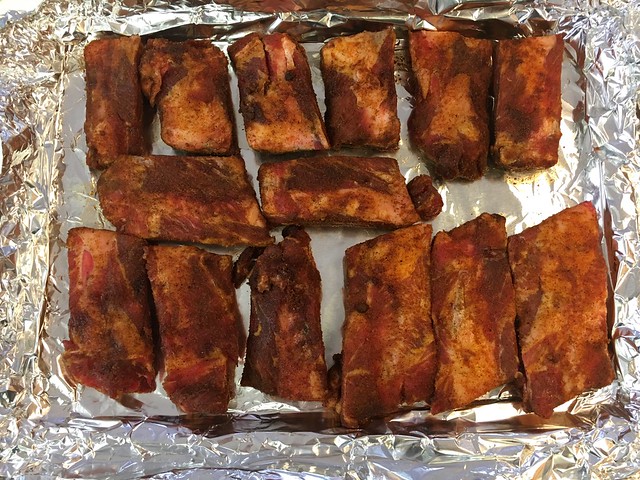
If the ribs aren’t pre-cut, cut them between the bones, first pulling the thin membrane off the back of the slabs (hint: grasp a corner of the membrane with a paper towel and pull steadily). Using a brush, coat the ribs with rub on all sides. I put my dry-rubbed ribs in a sealed Tupperware container and let them sit on the kitchen counter for about three hours.
Pre-heat the oven to 265°F. Cover the bottom of a large baking pan with aluminum foil and arrange the ribs in a single layer. Cover the ribs with more aluminum foil and crimp the edges. Bake on the middle rack of your oven for 3 1/2 hours.
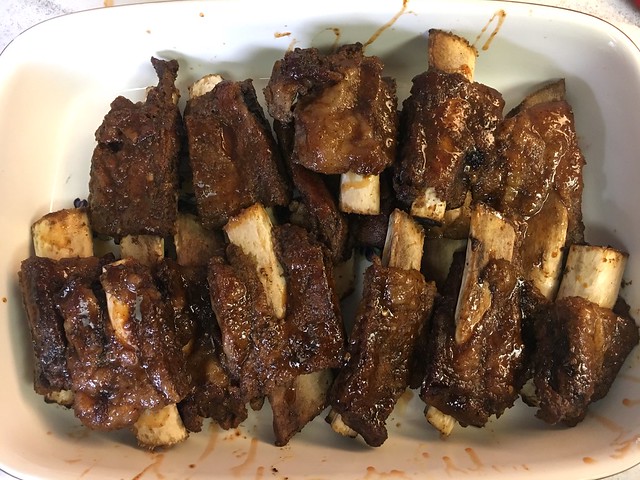
When the ribs are done, remove and discard the top layer of aluminum foil and gently transfer the ribs to a plate or platter—the meat will be very tender at this stage and if you manhandle the ribs the meat will come right off the bones. Pour the oil and fat out of the baking pan and replace the bottom layer of aluminum foil with a fresh sheet. Put the ribs back on the baking pan, brush them with a little barbecue sauce, and put them on the middle rack under the broiler, uncovered, for three to five minutes.
Notes
Two-and-a-half pounds of ribs is plenty for four.
Be sure to use a baking pan with raised edges—a lot of oil and fat will cook out of the ribs while they bake.
The purpose behind broiling the ribs after baking them is to make them crispy on the outside. I was going to finish mine off on the backyard gas grill, but the meat was so tender coming out of the oven it would have fallen off the bones and down inside the grill grating, so using the broiler to crisp them was the best option.
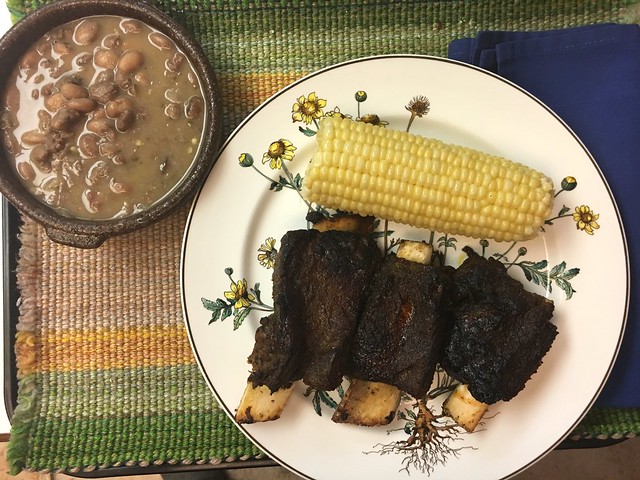
I served the ribs with corn on the cob and ranch beans. Chard or collard greens would be good sides as well. Some people like extra BBQ sauce, but since these ribs are both dry-rubbed and brushed with a little sauce, you probably won’t need any more.
This is the first dry rub I’ve made with oil in it. That’s what allows you to brush it on, which is a technique I like now that I’ve tried it. As for the rub’s flavor, I thought it a little mild, and next time I’ll add more chili powder and a little cayenne (maybe even a few drops of liquid smoke).
